Start with Jamjams on macOS
If you are setting up Just My Socks on a Mac today, start with Jamjams. It is the cleaner option for most users because it reduces manual configuration and can handle the common Just My Socks connection types without making you rebuild every server profile by hand.
The manual Shadowsocks path below is still useful if you prefer ShadowsocksX-NG, need to inspect each field yourself, or are troubleshooting a specific Shadowsocks connection.
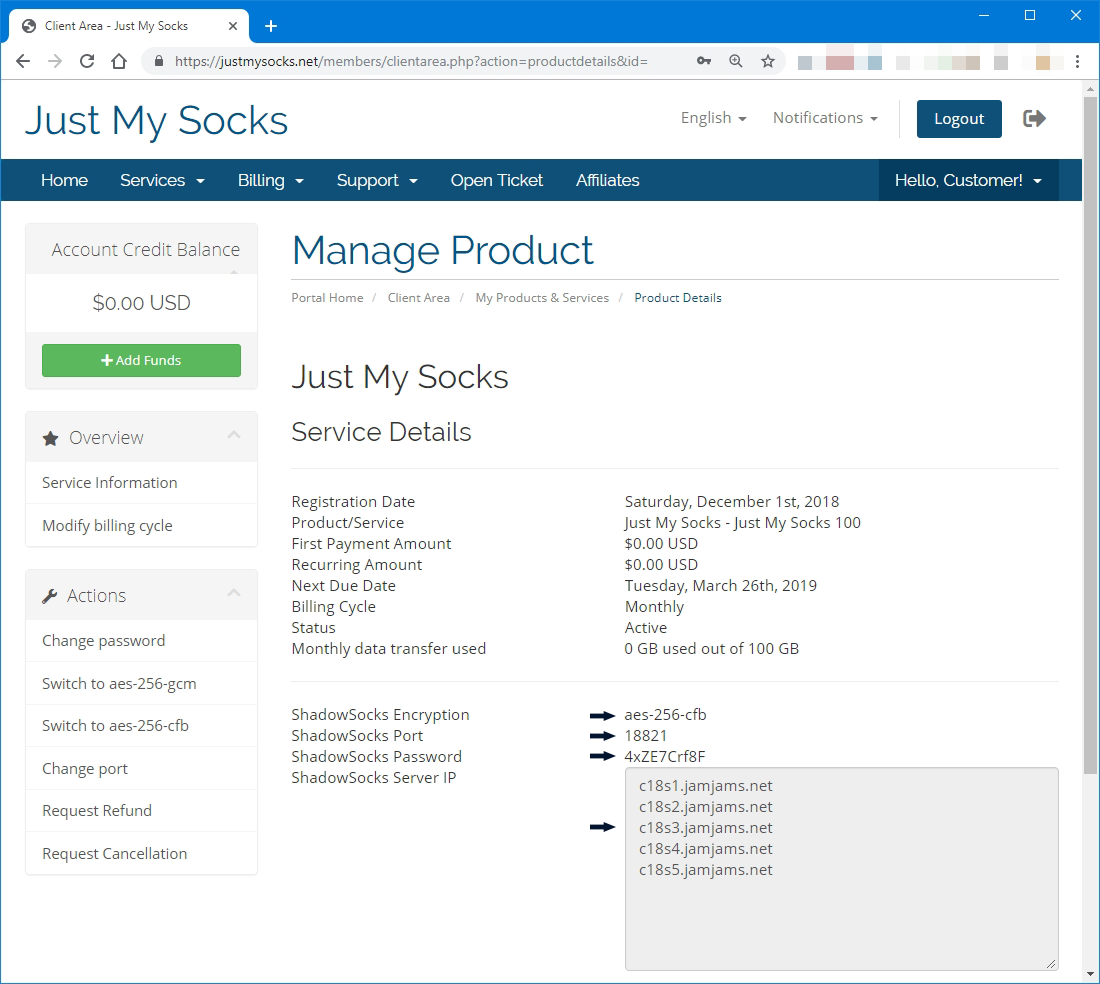
Open your service details first
Sign in to your Just My Socks account, open Services, then choose the active service you want to use on this Mac. Keep that service page open while you configure the client.
You will need the server address, port, password, encryption method, and any plugin or OBFS information shown for the selected service.
Install ShadowsocksX-NG
Download ShadowsocksX-NG from the provider’s macOS setup resources or from the location referenced in your account panel. Install it like a normal Mac app, then look for the Shadowsocks icon in the macOS menu bar.
Add the server profile
From the menu bar icon, open Servers and then Server Preferences. Create a new server entry and copy the values from your Just My Socks service page into the matching fields.

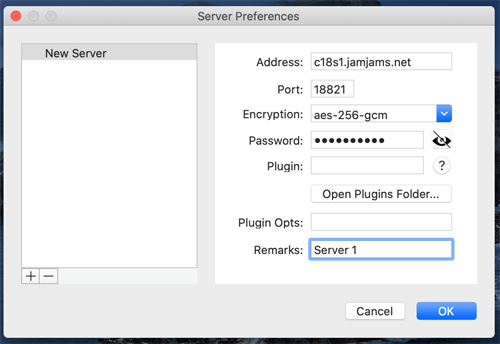
Take your time with the password and encryption fields. A single missing character or mismatched method is enough to make the connection fail.
Add OBFS settings when your plan requires them
Some premium Shadowsocks servers include OBFS plugin settings. If your service page shows plugin information, enter both the plugin name and plugin options in ShadowsocksX-NG.

Do not invent OBFS values. Only use the plugin details shown in your service panel, because those settings are tied to the selected server.
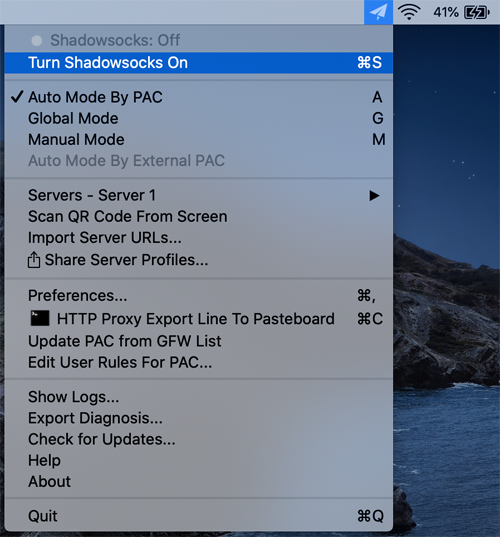
Turn on Shadowsocks
Once the server profile is saved, choose the proxy mode you want to use. Global mode is useful for a quick test because it makes it easier to confirm that traffic is actually going through the proxy.
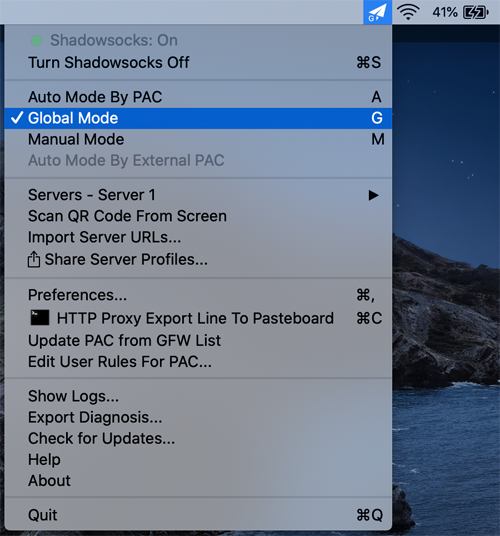
Then turn Shadowsocks on from the menu bar.
Confirm the connection
After the client is enabled, open a few websites and confirm that the selected route behaves as expected.
If the connection does not work, compare the Mac profile against the service panel again. Server, port, password, encryption, and OBFS settings should all match before you try a different route.